
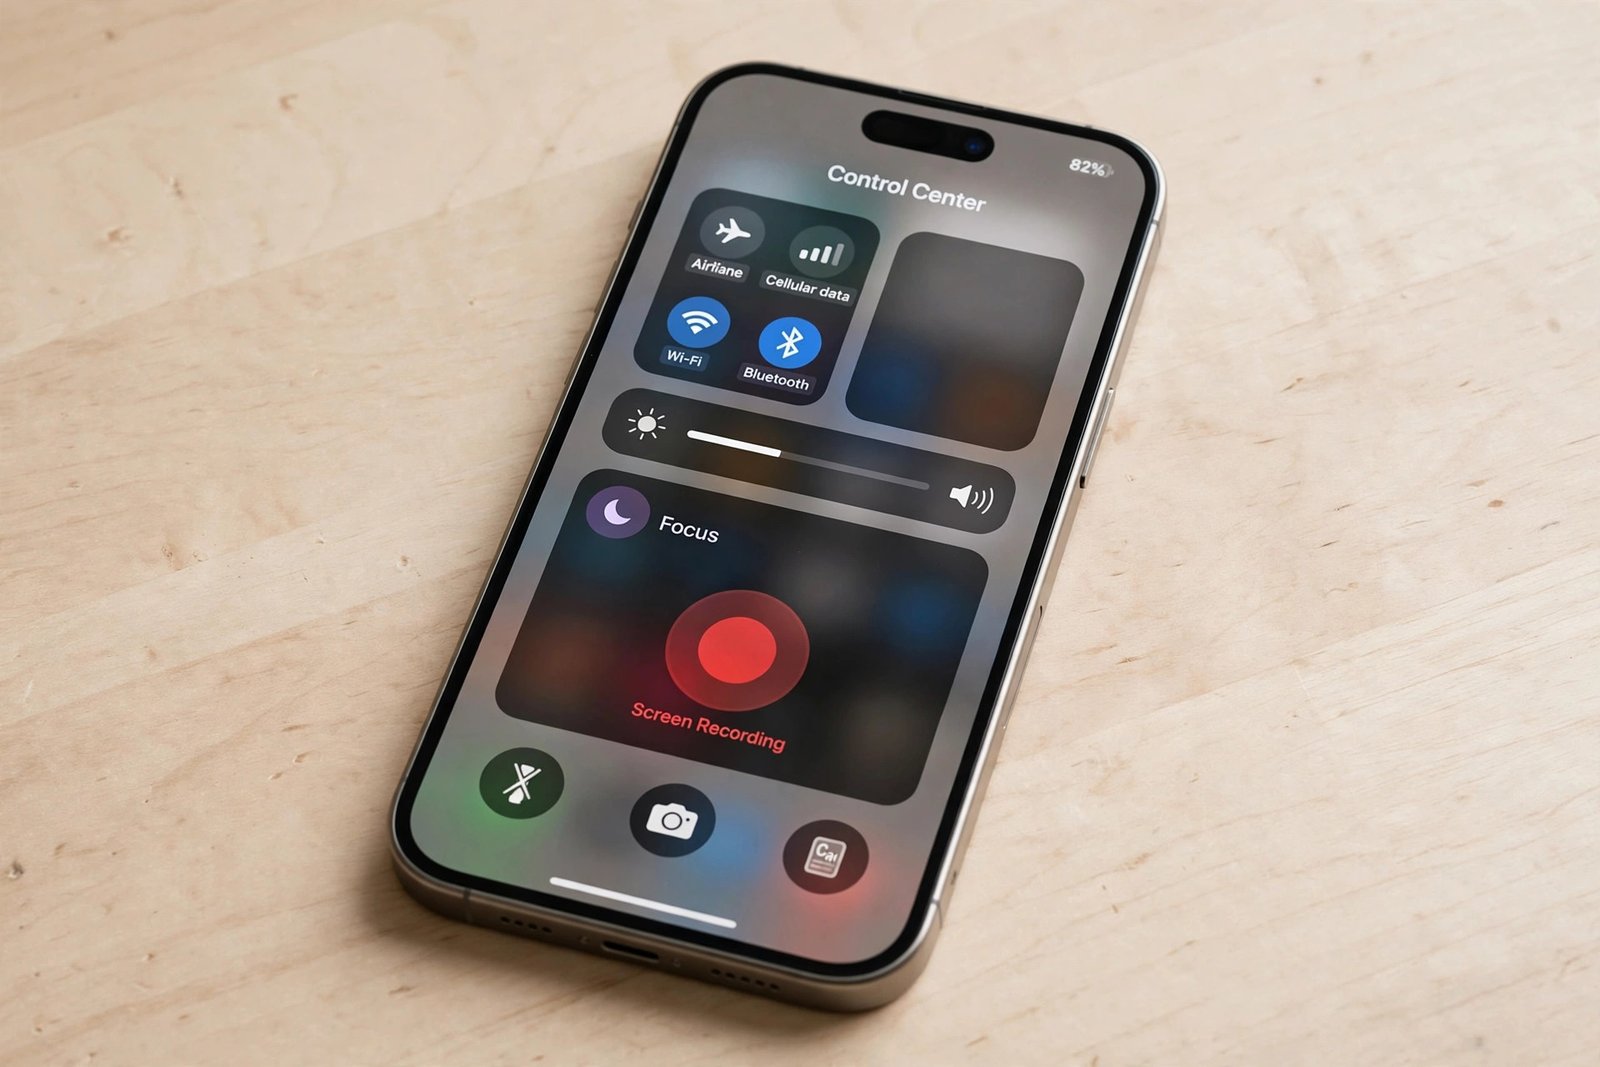
There is a moment every iPhone owner knows. Something is happening on your screen and you need to show it to someone else: a setting that will not behave, a step in an app you want to explain to a parent, a game moment worth keeping. A screenshot shows one frame. A recording shows the whole thing.
To record your iPhone screen, open Control Center, tap the Record button, wait for the three-second countdown, and use your phone normally. The video saves to the Photos app automatically. No app is needed, and recording your screen on iPhone has been built into every iPhone since iOS 11. This guide explains how to record screen on iPhone from start to finish: adding the button if it is missing, recording with sound, finding your videos, the honest limits of what can and cannot be recorded, and the fixes for the problems that stop recordings.
How to turn screen recording on iPhone
The Screen Recording button lives in Control Center, but it is not always there. On some iPhones it is present from the start. On others you add it once and it stays. Either way, this takes under a minute.
How to put the Screen Recording button on your iPhone
On iOS 18 and later, you add controls from inside Control Center itself:
- Open Control Center. On an iPhone with Face ID, swipe down from the top-right corner. On iPhone SE, swipe up from the bottom edge.
- Tap the Add (+) button at the top of Control Center to start editing.
- Tap Add a Control at the bottom of the screen. The controls gallery opens.
- Find Screen Recording and tap it. It is added to Control Center.
- Close Control Center by swiping up from the bottom centre of the screen (on iPhone SE, press the Home button).
That is the one-time setup. The button stays in Control Center until you remove it.
On iOS 17 and earlier, Apple used a different path. Go to Settings, then Control Center, and tap the green + next to Screen Recording. If your iPhone runs an older version and the Add (+) button does not appear in Control Center, this is why. You can check your version in Settings, then General, then About, under Software Version.
One more thing worth knowing: on current iOS, Control Center is organised into groups of controls, and you move between them by swiping the icons along the right edge. If you added Screen Recording but cannot see it, you may be looking at the wrong group. Swipe through the groups and it will be there.
How to record your iPhone screen, step by step
Once the button is in place, recording takes three moves. This is how to record screen on iPhone:
- Open Control Center.
- Tap the gray Record button (a solid circle inside a ring). A three-second countdown starts.
- Leave Control Center and use your phone normally. Everything on the screen is being recorded.
To stop, tap the red recording indicator at the top of the screen, then tap Stop. On iPhones with Dynamic Island it appears there; on older models it is a red bar or a red timer at the top left. You can also open Control Center again and tap the red Record button, which stops the recording the same way.
The video saves to the Photos app as soon as you stop. There is no save dialog and nothing to confirm. If you want to check it worked, open Photos and look at the most recent item in your Library.
A small detail that catches people out: the three-second countdown is real recording time in the sense that the timer runs, but the countdown itself is not in the video. The recording starts when the countdown finishes, so you have a moment to get to the screen you want to show. If you need longer to set up, start the recording first and trim the start later. Trimming takes seconds and I cover it below.
How to record your iPhone screen with sound
By default, a screen recording captures the picture but not your voice. If you are explaining something as you go, you need to turn the microphone on before you start:
- Open Control Center.
- Touch and hold the gray Record button. A menu opens.
- Tap the Microphone button to turn it on. It turns red when it is on.
- Tap Start Recording (or the Record button), wait for the countdown, and leave Control Center.

Your voice is now recorded along with the screen. The microphone picks up whatever is around you, so a quiet room matters more than any setting. I record tutorials in a room with the fan off and the door closed, and the difference is obvious.
There is a distinction worth understanding. The microphone records sound from around you: your voice, a conversation, background noise. It does not guarantee that audio from inside an app is captured. Some apps allow their audio to be recorded and some do not. If you record a game and the video has no game sound, that is the app blocking its audio, not a setting you missed. The same applies to video in some apps. Apple says plainly that some apps might not allow you to record audio or video, and there is no switch that overrides that.
If your recording has no sound at all, the usual cause is simpler: the microphone was off. It resets between recordings in the sense that you must turn it on each time you want it. Make it a habit to long-press the button and check the microphone before every recording that needs a voice.
Where do screen recordings go?
Every screen recording saves to the Photos app, in your Library, alongside your photos and videos. The newest recording is the most recent item. On current iOS you can also find them grouped: open Photos, go to Collections, then Media Types, then Screen Recordings. That view shows only recordings, which is useful when your library is large.
Recordings back up the same way your photos do. If iCloud Photos is on, a recording uploads to iCloud when the phone is on Wi-Fi and charging, and it counts against your iCloud storage. A long recording can be several hundred megabytes, so it is worth knowing where your iCloud space stands before you record a 20-minute tutorial. My iCloud guide covers how to check what iCloud is holding and how to free it up without paying.
One habit saves trouble later: name nothing, but delete quickly. Recordings pile up fast, and the ones you never watch again are dead weight in your library. The iPhone storage guide I wrote recently mentions exactly this problem: the screen recordings you never watched again are among the first things to clear when space gets tight.

Can you record a phone call or a streaming app?
This is where honest limits matter, because the answer is mostly no, and articles that pretend otherwise waste your time.
Streaming apps: Netflix, Disney+, Amazon Prime Video and most paid video apps protect their content. When you try to record them, you usually get a black screen with sound, or the recording refuses to start. This is deliberate copy protection, not a bug, and no setting on the iPhone changes it. YouTube is the exception in most cases: regular YouTube videos generally record fine, though some rented or purchased content is protected.
Phone calls: screen recording does not capture phone call audio. If you record your screen during a call, you get the picture of the call screen and silence. Apple does not offer call recording through the screen recorder, and that is by design. Separately, recording a call without the other person’s knowledge is illegal in many places, so this is one of those limits that is also a legal boundary.
FaceTime: a FaceTime video call will record, and you will see the video. Whether the other person’s voice is captured depends on the setup, and it is unreliable. If you need a record of a video call, say so at the start of the call and use a tool built for it rather than hoping the screen recorder catches the audio.
Games and regular apps: these almost always record without trouble, picture and in-app sound included, unless the app itself blocks recording. A few banking and security apps block recording of their screens entirely. That is the app protecting sensitive information, and it is working as intended.
| What you are recording | Picture | Sound | Notes |
|---|---|---|---|
| Regular apps and games | Yes | Usually yes | A few apps block recording entirely |
| YouTube (regular videos) | Yes | Yes | Rented or purchased content may be protected |
| Netflix, Disney+, Prime Video | Usually black | Sometimes | Copy protection; no setting changes this |
| Phone calls | Call screen only | No | Screen recording does not capture call audio |
| FaceTime video | Yes | Unreliable | The other person’s voice may not be captured |
| Banking and security apps | Often blocked | Often blocked | The app is protecting sensitive information |
How to record your iPhone screen on a Mac
If you record often, or you want longer recordings with a bigger screen to watch, a Mac is the better tool. QuickTime Player, which comes free with every Mac, can record your iPhone’s screen directly:
- Connect your iPhone to the Mac with a cable and open the iPhone with your passcode or Face ID.
- If the iPhone asks whether to trust the computer, tap Trust.
- Open QuickTime Player on the Mac.
- Go to File, then New Movie Recording.
- Next to the red record button, click the small arrow and choose your iPhone as the camera source. Choose the iPhone as the microphone too if you want your voice.
- Click the record button. Your iPhone screen appears in the QuickTime window and everything you do on the phone is captured.
- Click stop when you finish, then save the file from the File menu.
The recording is saved on the Mac, not the phone, which is the real advantage: a 30-minute tutorial does not eat your iPhone storage at all. The quality is also a step up, because you are capturing the phone’s output directly rather than encoding on the phone. The trade-off is the cable and the setup time, so this is a method for planned recordings, not for catching something quickly. For anything spontaneous, the Control Center button is still the right tool.
| Method | Setup | Sound | Best for |
|---|---|---|---|
| Control Center button | Add once, then one tap | Microphone on request | Everyday recordings, quick clips |
| Siri | None | No voiceover | Hands-free starts, silent clips |
| Mac with QuickTime | Cable + a few minutes | iPhone mic as source | Long tutorials, planned recordings |
Can Siri start a screen recording?
Yes. Say “Hey Siri, start screen recording” and Siri starts one, with the usual three-second countdown. Say “Hey Siri, stop screen recording” to end it. It works, and it is genuinely useful when your hands are full or when tapping through Control Center would disturb what is on the screen.
I would not rely on it as the main method. Siri needs to hear you clearly, and in a noisy room it may not. It also cannot turn the microphone on for you, so a Siri-started recording has no voiceover unless you set that up first. Think of it as a shortcut for silent recordings, not as a replacement for the button.
How long can you record for?
Apple gives no maximum recording length. The practical limit is your free storage. A recording is a video file, and video files are large: a few minutes is manageable, but a long tutorial can take a noticeable share of a nearly full phone. If storage runs out mid-recording, the recording stops, and you may lose the file.
Before a long recording, check your free space in Settings, then General, then iPhone Storage. If you are under a few gigabytes free, clear space first. My guide to freeing up iPhone storage walks through the nine fixes that actually work, starting with the ones that take minutes: offloading unused apps, clearing the Recently Deleted album, and trimming the photo library. The single most effective step before recording is deleting old recordings you no longer need, since they are often the largest files in the library.
As a rough guide, a short clip of a minute or two is a small file you never need to think about. A 10-minute tutorial is worth checking space for. A 30-minute recording deserves the Mac method above, where storage is not a concern at all.
How to edit a screen recording on iPhone
The Photos app handles the basics well enough that most recordings never need another app:
- Open the recording in Photos and tap Edit.
- Drag the sliders at the start and end of the timeline to trim. This is how you cut the three-second countdown fumble and the trailing seconds where you reached for the stop button.
- Tap Done, then Save Video to replace the original, or Save Video as New Clip to keep both.
You can also crop, rotate, adjust brightness and add a filter from the same Edit screen. For a quick tutorial or a bug report, that is enough.
When it is not enough, when you want text on screen, transitions, background music or picture-in-picture, that is a video editor’s job. I compared the two free editors most people start with in my CapCut vs VN comparison, and either one handles screen recordings well. CapCut is the easier start; VN gives you more control over the timeline. What I would not do is install a dedicated “screen recorder” app from the App Store: the built-in recorder already does the recording, and a separate app only adds ads and watermarks to a job the iPhone does for free.
Screen recording not working? 7 fixes
When screen recording fails, it is almost always one of these. Work through them in order.
1. The button is missing. Add it through Control Center, as covered in the first section. On iOS 18 and later: Control Center, Add (+), Add a Control, Screen Recording. On iOS 17 and earlier: Settings, Control Center, tap + next to Screen Recording.
2. You cannot open Control Center inside an app. There is a setting for this. Go to Settings, then Control Center, and make sure Access Within Apps is on. If it is off, swiping does nothing while an app is open, which is exactly when you most want to record.
3. A Screen Time restriction is blocking it. On a family-managed iPhone, or one set up by a school or workplace, screen recording can be switched off under Settings, then Screen Time, then Content and Privacy Restrictions. If the Record button is missing and you cannot add it, this is the likely cause. You need the Screen Time passcode or the person who manages the phone to change it.
4. Your storage is full. A recording needs somewhere to go. If the phone is nearly full, recordings fail or stop almost immediately. Free up space first, starting with old recordings and the Recently Deleted album.
5. The recording has no sound. The microphone was off. Long-press the Record button before you start and check that Microphone is on. It must be turned on for each recording that needs a voice.
6. The screen is black in one app. That app is protecting its content. Streaming apps and some banking apps block recording by design. Nothing in Settings fixes this, and no third-party app legitimately gets around it either. Record something else.
7. You are screen mirroring. Apple says you cannot record your screen and use screen mirroring at the same time. If your iPhone is mirrored to a TV or a Mac through AirPlay, stop the mirroring first, then record.
If none of these apply, restart the iPhone. It is the oldest fix there is, and it still clears the occasional glitch where Control Center stops responding.
Screen recording on the latest iOS
The steps in this guide match the current release, iOS 27.2.1, which arrived in November 2026. If your iPhone has just updated and something looks different, here is what changed and what did not.
What did not change: the core recording flow is the same as it has been since iOS 11. Control Center, Record button, three-second countdown, video in Photos. Apple has not moved it or renamed it.
What did change over the recent versions: Control Center itself. Since iOS 18, controls are added from inside Control Center rather than from Settings, and the controls are organised into groups you swipe between. If you followed an older guide that sent you to Settings and the option was not there, that is why. The iOS 17 path still works on iOS 17 phones, but anything running iOS 18 or later uses the in-Control-Center gallery.
The steps are the same on every current model: iPhone 17, iPhone 16, iPhone 15 and the newer iPhone Duo all record the same way. The only real difference is the Home button. On iPhone SE, and on iPhone 8 and earlier, you open Control Center by swiping up from the bottom instead of down from the top-right corner, and you close it by pressing the Home button. Everything after that is identical.
One more note for people who updated recently: after a major iOS update, Control Center can reset to its default layout. If your Screen Recording button vanished after an update, it was not removed from the phone. Add it again from the controls gallery and it will stay put.
What I would do
Screen recording is one of those features that sounds minor until you need it, and then nothing else will do. I use it for three things: showing someone a fix step by step, reporting a bug with proof instead of a description, and saving a short clip I want to keep. For all three, the built-in recorder is enough. It is fast, it is free, it saves straight to Photos, and it needs no app.
What I would not do is install a screen recorder app. The App Store is full of them, and they exist mostly to sell subscriptions and add watermarks to a job the iPhone already does. The only genuine upgrade is the Mac method for long recordings, and that uses QuickTime, which is already on the Mac.
If you record one thing after reading this, make it a test: add the button now, record ten seconds of your home screen, and find the video in Photos. The next time you actually need a recording, you will not be learning the steps under pressure. And before any long recording, check your storage. The recording that stops halfway because the phone ran out of space is the one you cannot redo.
Frequently asked questions
Yes. Every iPhone running iOS 11 or later has a built-in screen recorder in Control Center. No app is needed. If you do not see the Record button, add it from the controls gallery in Control Center.
The microphone was off. Screen recording captures the picture by default and your voice only when the microphone is on. Touch and hold the Record button before you start and tap Microphone to turn it on. If the microphone was on and an app’s audio is still missing, that app blocks its audio from being recorded.
The same way as any iPhone, with one difference: open Control Center by swiping up from the bottom edge instead of down from the top-right corner. Tap the Record button, wait for the countdown, and use the phone normally. Close Control Center by pressing the Home button.
You can record the video of a FaceTime call with the screen recorder, but the other person’s voice may not be captured reliably. If you need a record of a call, tell the other person first and use a tool built for recording calls.
In the Photos app, in your Library, as the most recent item. You can also find them grouped under Collections, then Media Types, then Screen Recordings. If iCloud Photos is on, they back up to iCloud like any other video.
The most common cause is storage running out. Check your free space in Settings, then General, then iPhone Storage. Other causes: the app you are recording blocks recording, or screen mirroring is running at the same time.